
Reseal Your RV Roof: Essential Maintenance to Protect Your Investment
Share
One of the most overlooked aspects of RV ownership is roof maintenance. Yet, the condition of your roof plays a crucial role in safeguarding your RV from costly water damage. In our YouTube video, Reseal Your RV Roof | RV Roof Maintenance, we walk you through the step-by-step process of properly resealing your RV roof to prevent leaks and extend its life.
Why Regular Roof Maintenance Matters
The roof of your RV is constantly exposed to the elements—sun, rain, wind, and debris—all of which can cause wear and tear over time. Small cracks in your roof sealant may seem minor but can lead to serious water damage if left unchecked. Performing an annual inspection and resealing your roof as needed is a simple yet effective way to avoid expensive repairs down the road.
Tools and Materials You’ll Need
To reseal your RV roof effectively, you’ll need the following:
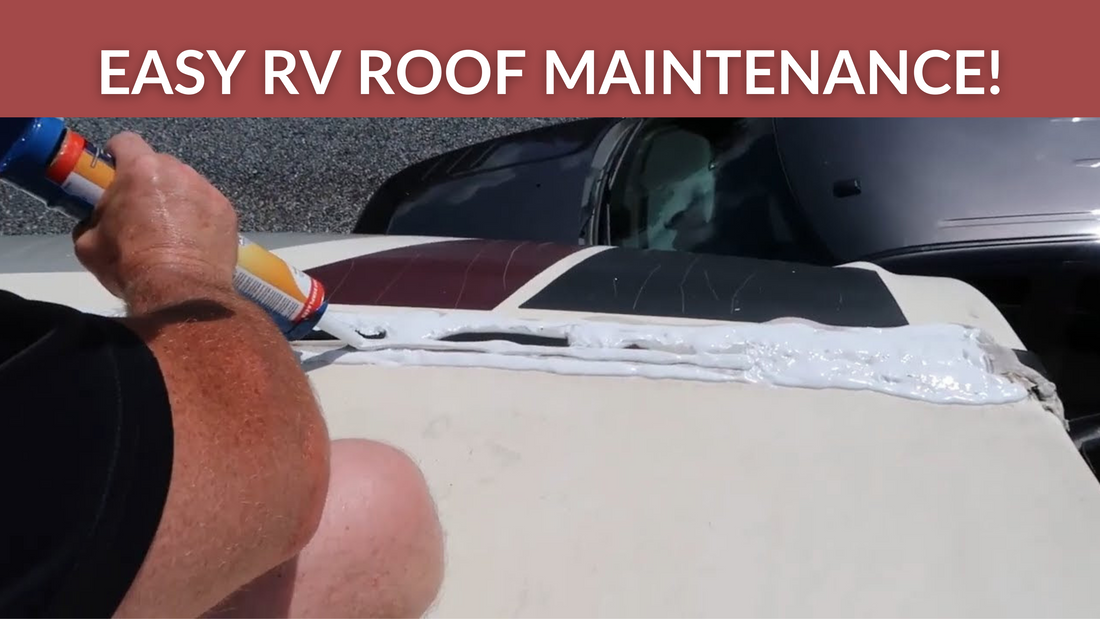
- Dicor Self-Leveling Lap Sealant: Perfect for flat horizontal surfaces.
- Dicor Non-Sag Lap Sealant: Ideal for vertical seams and edges.
- Cleaning supplies: Soap, water, and a clean rag to prepare the surface.
- Caulking gun: To apply the sealant evenly.
These materials are readily available and, as we point out in the video, are often more affordable online than at RV shops.
How to Reseal Your RV Roof
- Inspect the Roof: Start by thoroughly examining all seams, edges, and vents for cracks or wear in the sealant.
- Clean the Surface: Use soap and water to clean the areas you’ll be resealing, ensuring the surface is dry before applying new sealant.
- Apply Dicor Sealant: Use the Self-Leveling Lap Sealant on horizontal seams and the Non-Sag Lap Sealant on vertical seams. Follow the instructions for even application.
- Check Your Work: Once applied, inspect the resealed areas to ensure full coverage and a tight seal.
Stay Ahead of Repairs
Performing annual roof inspections and resealing as necessary can save you thousands in repairs and keep your RV in top condition for years to come. For a detailed walkthrough, watch our full video here. We’ll guide you through every step to make this essential maintenance task straightforward and effective.
Protect your RV and enjoy the peace of mind that comes with a leak-free roof!